

When painting on glass, it is important to use an enamel based paint such as Folk Art Enamels. Acrylic paints are water based and will easily peel off of any glass surface. Martha Stewart just came out with an awesome line of enamel paint with amazing colors, I've just found that Folk art cost a bit less. (these are the colors I used for this project)


Painting the Feather
1. Creating the base: I painted a yellow circle in the middle of the glass. Then a green line around the yellow, and then teal blue around the green and yellow. I brought the top right to a point with the teal as well as the bottom left.
- to make teal mix the teal from the bottle with white

2. Adding feathers: After the main shapes were dry, I started adding layers of feathers with the gold color. I used a small brush and did quick, wispy marks within the teal level.

3. I continued adding the strands of feather with the same teal color used in the base. I took the design further down the glass on the bottom left side. Then I basically did the same thing to add more strands over the blue and in-between the blue strands.
- to make lime green mix the dark green, yellow, and white


4. Next, use the teal from the bottle, and paint a line around the lime green ring and paint feathers from it alternating the way the feathers expand and curl outward.
5. Also, use the darker teal to paint an oval within the yellow circle in the center.

6. Next, I used navy blue from the bottle, to add a few skinny strands around the feather. I also used the navy blue to add a bean shaped oval in the center of the teal circle added in step 5.

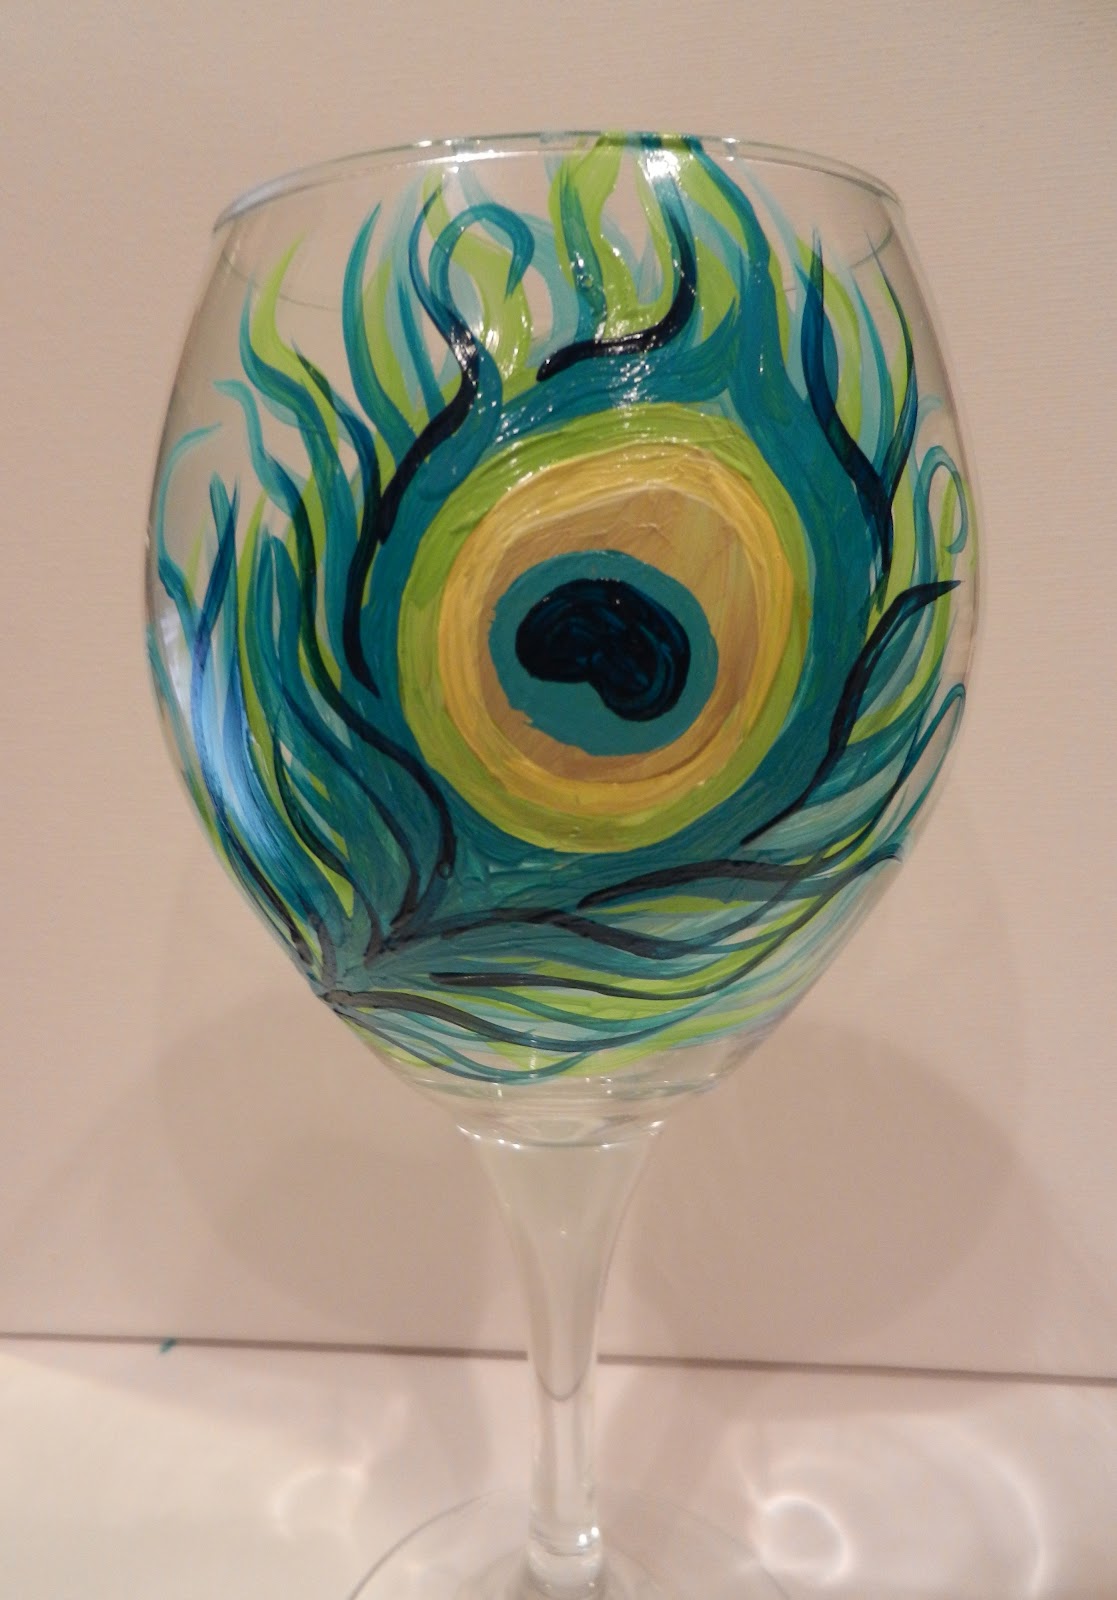
7. Lastly, I used the purple color from the bottle to add the final layer of feather strands around the interior ring. I also added a line of navy blue in the center teal circle.
Annddd.. you're done!


Painting the Initial
1. Using the light teal color, paint a circle on the side of the wine glass opposite of the feather.

2. Now, paint a 1/2inch lime green line around the teal circle

3. Use the darker teal, from the bottle, to outline the light-teal circle, as well as the lime green line

4. Then, use navy blue to paint the desired initial in any font of your choice.

5. Add navy blue polka dots within the green ring, and try to space them equal distance from one another.
Andd. you're done!!
Super easy!

To Seal:
-once the paint has had AT LEAST 24 hours to dry, your work is safe to be sealed. This specific paint should be usable without needing a sealant coat, I would just rather be safe than sorry :) So, I just use any type of clear coat (purchased at any hobby/craft store) to finish off my work. Lightly spray a few layers onto the glass pausing 1minute between each layer. Allow 48 hours for the final coat to dry.
Good luck and happy glass painting!
xoxo Rhiannon
Wow, that is absolutely gorgeous!! Thanks for the fun tutorial, I will have to try this technique sometime. Thanks for visiting my blog also, I've been so busy with the holidays & vacation it took awhile to get back to you, but I hope I see you around again!!
ReplyDeleteLinda
http://lasteve1.blogspot.com
Are they dishwasher safe? Or do you suggest hand washing? This looks like a fun project - thanks for sharing!
ReplyDeleteI definitely suggest handwashing! I haven't had any problems with that. The specific paint that I used has directions on the tube for baking the glass and paint to seal it better, which could make it safer for washing. :)
Delete